A 16 Step by step guide on downloading and saving a Mobile Preset to Lightroom
A 16 Step by step guide on downloading and saving a Mobile Preset to Lightroom. If you are after a walk through on downloading a Preset you haven’t created and want to start editing your pictures- you have come to the right place. While this is a general step by step guide, feel free to download my free preset here.
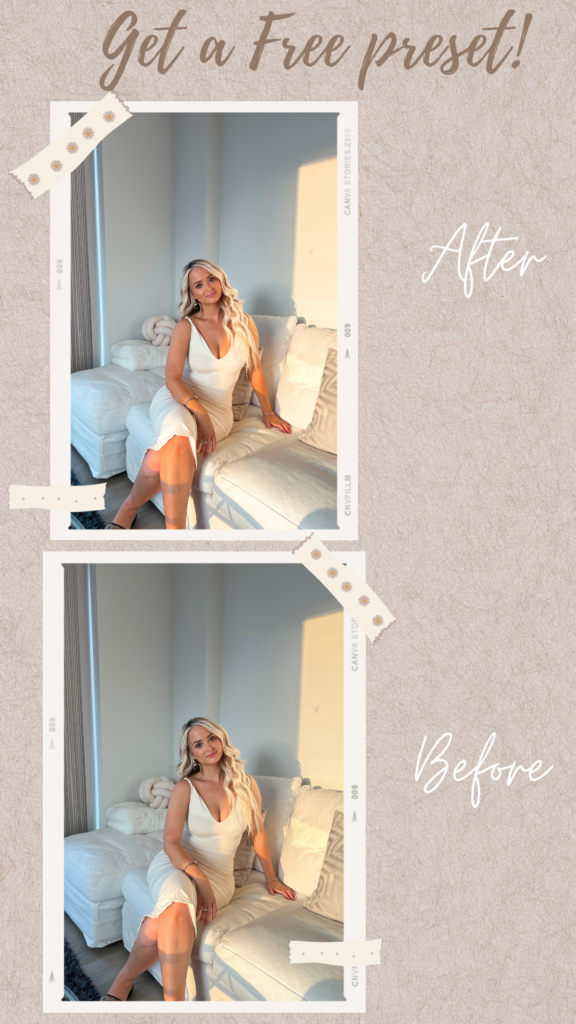
You can download or buy free presets online like here. This guide is to help you on how you download and also save your downloaded preset. Below is an example of when you have been sent a raw DNG photo saved on google drive. You may have downloaded a preset from dropbox, however the approach is very much the same- saving the photo to your photos. So you are able to save it and use it on all your pictures!
1.
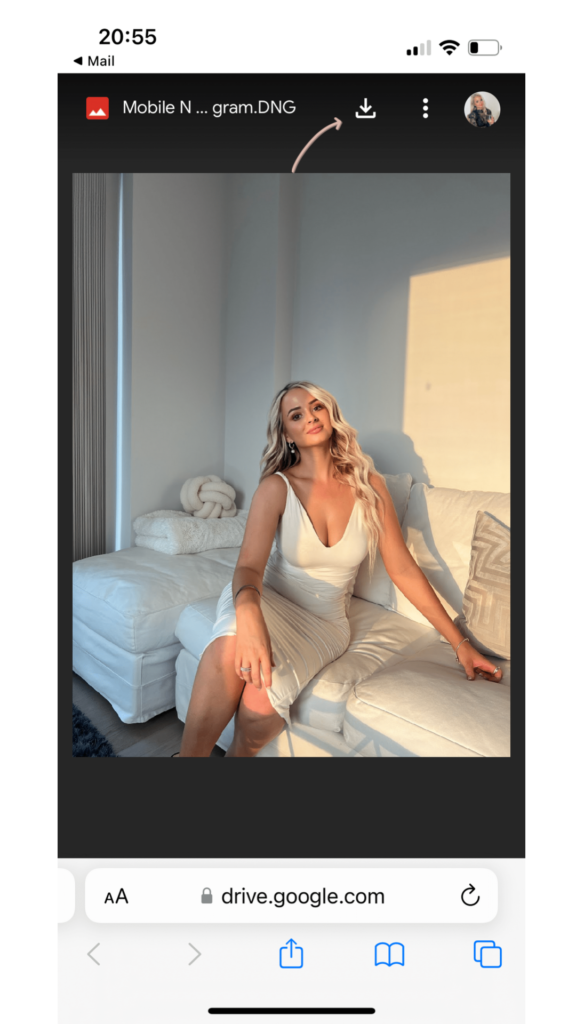
The first step is to click on the photo and click the save button to download onto your photos. Below describes the steps involved in saving the photo you will go through…
2.
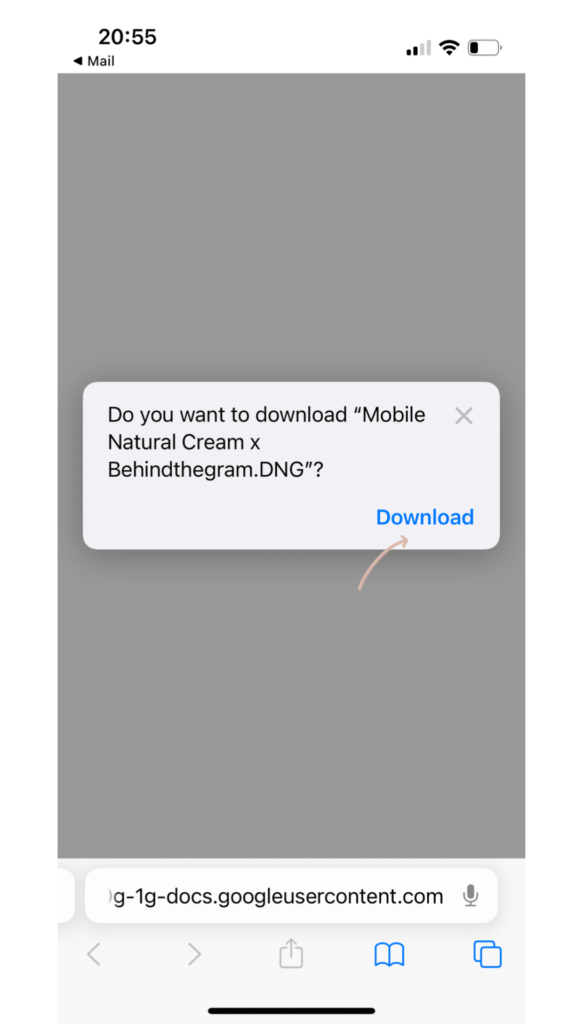
The next step, this will pop up asking if you wish to download the version. Click ‘Download.’
3.
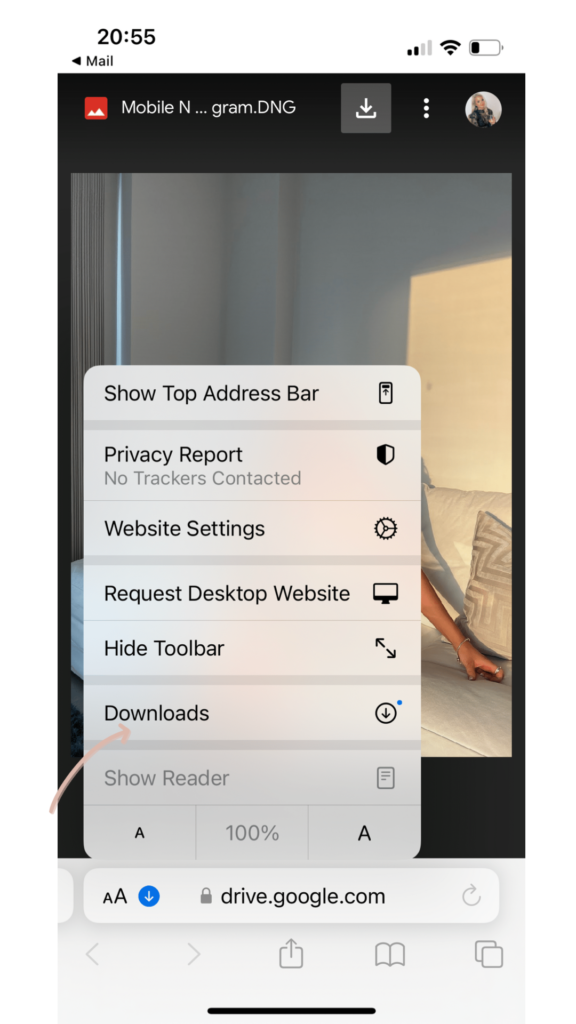
Here the picture will start downloading, it may take a few seconds. Click on the downloads section once it looks complete.
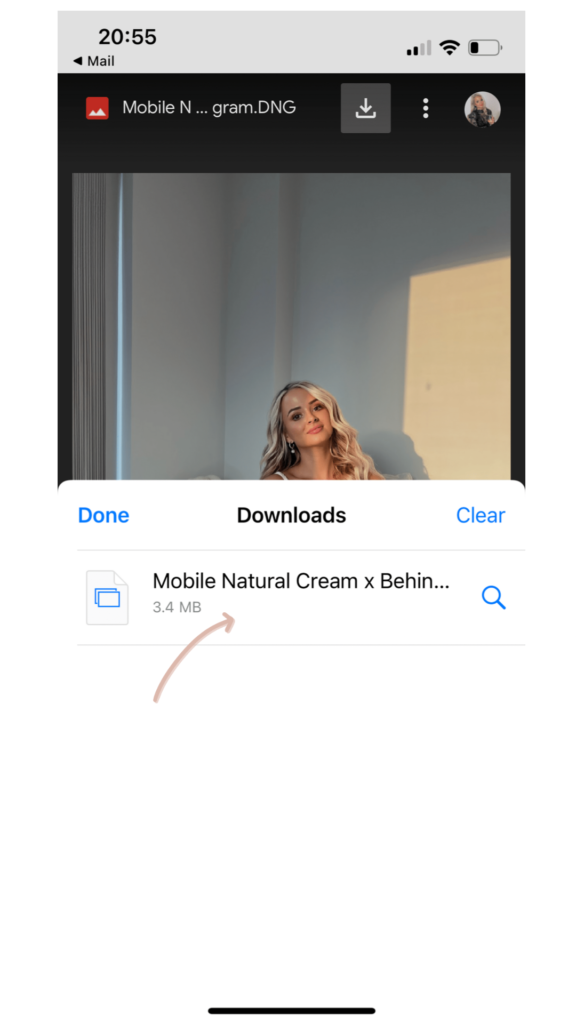
4.
Once the image has been downloaded it will be displayed in your downloads section like this. Simply click on this section.
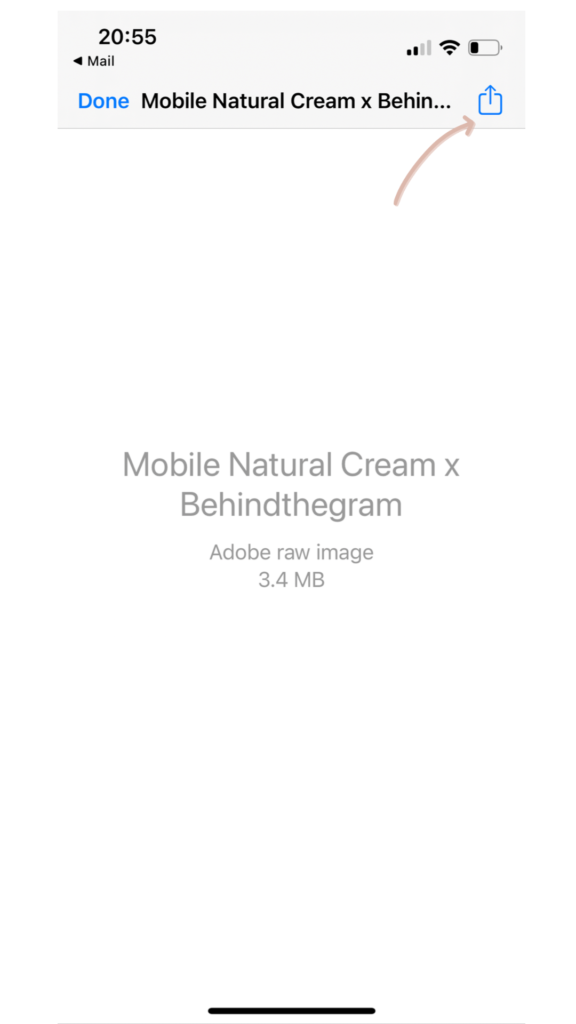
5.
Click the above top right to download the preset.
6.
The next step, it will give you the option to save your photo or share it in different places. Simply click ‘Save Image.’
7.
The image on your phone should look like there is just a blank white image. This is because it is saved as a raw photo in DNG. Don’t be worried this is completely normal, now the next steps will be opening the image in Lightroom…
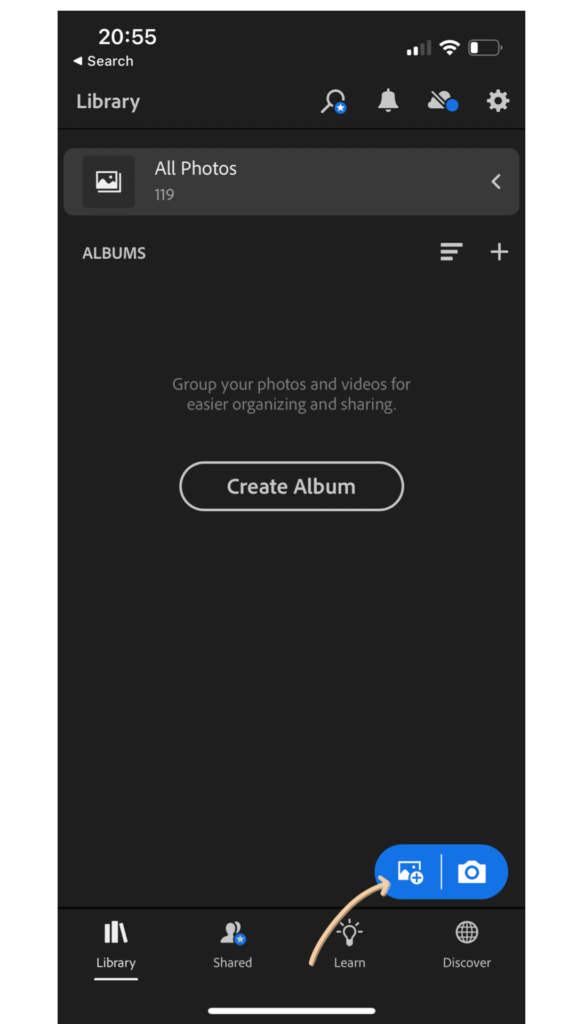
8.
As you open up your Lightroom app, click on the image of a photo to add your photo you have just downloaded to your photos album.
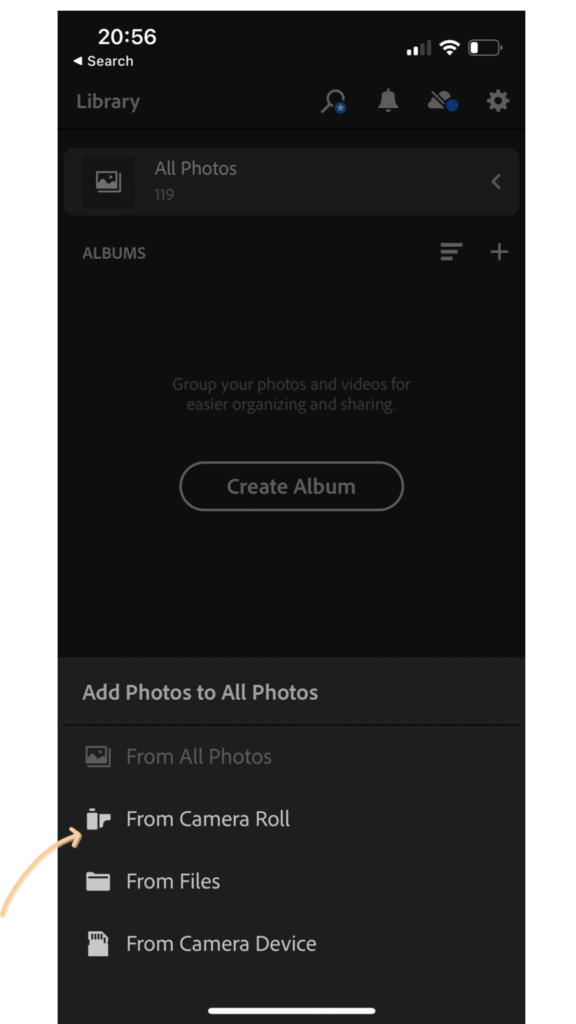
9.
After clicking to upload your image it will ask you where to access the photo from. We just downloaded it to your photos so click ‘From Camera Roll.’
10.
Once you have selected the image which looks like no image, it’ll preview in your file like it looked on Google Drive – or wherever else you originally accessed the photo. Here once you have imported it, make sure to click the tick icon.
11.
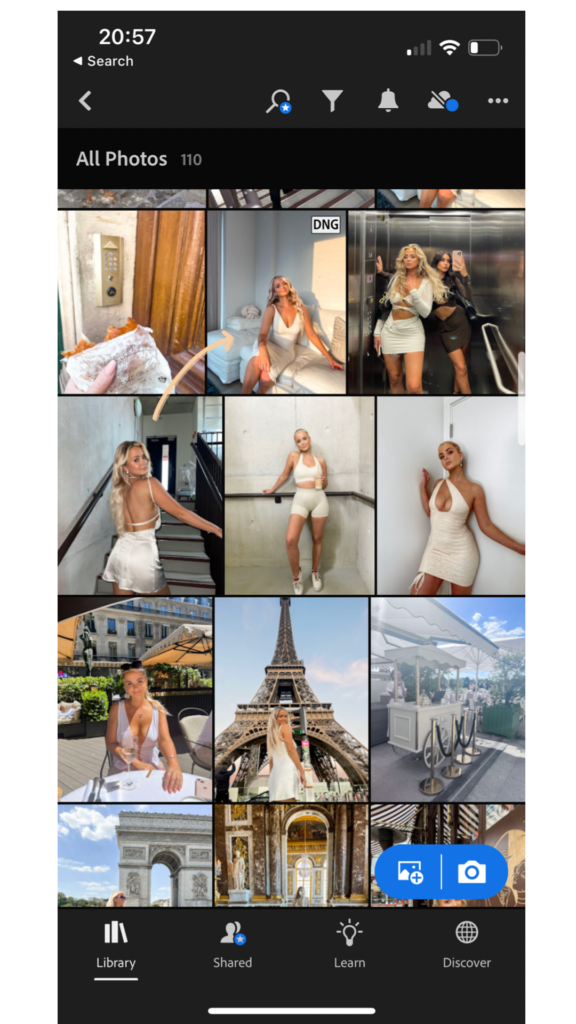
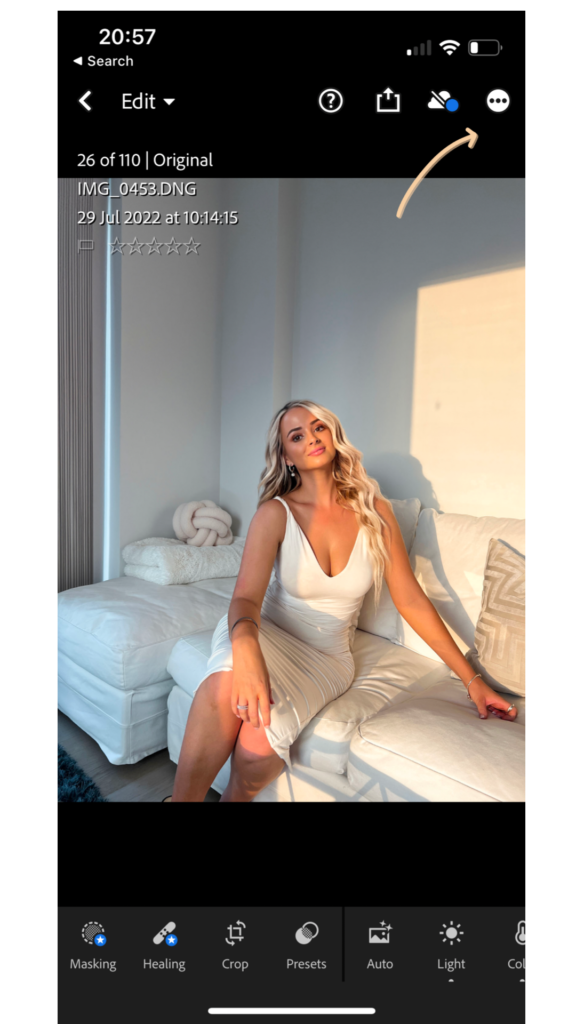
Once you have then downloaded the photo it’ll be displayed in your photo library with any other saved photos. Here you see the photo has been saved and it indicates if it is a ‘DNG’ image. Now click on the image so we can start to save the preset.
12.
Now you have the picture from Lightroom, click on the icon with the 3 dots. This way you can begin to save it to the ‘Presets’ section on the bottom of the image.
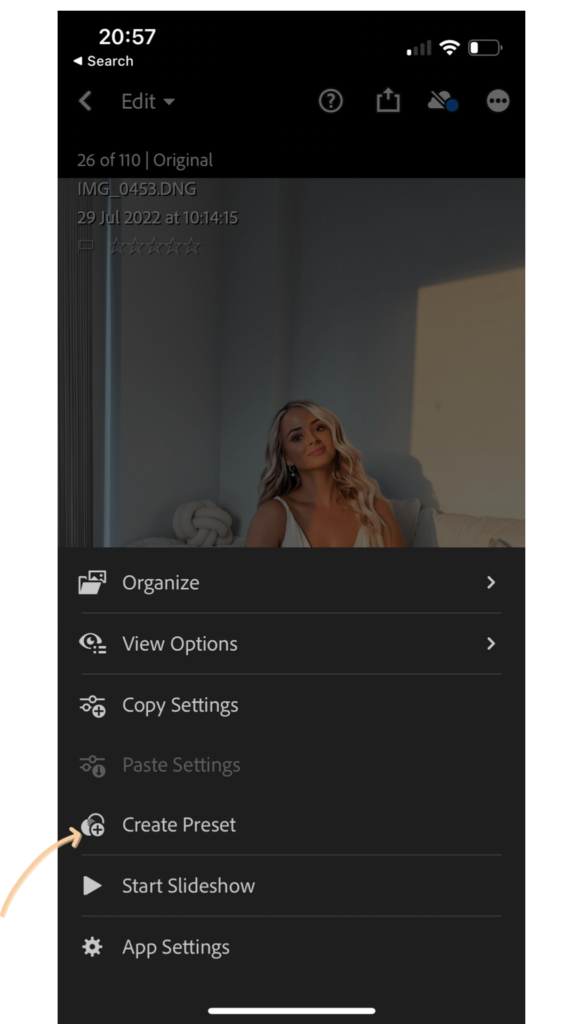
13.
Here you will see the option to ‘Create Preset’ which is exactly what we want to do! So click this option.
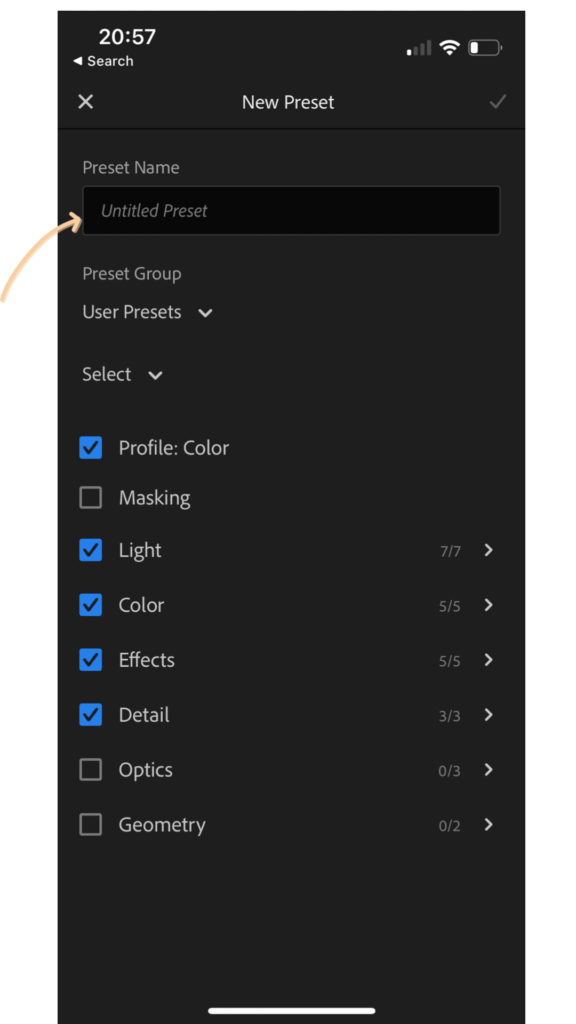
14.
Next you have the option of naming the preset- usually I keep this as whatever it was originally called- or you can be creative. For instance for some pictures I know the preset help brightens it up, I may save it as ‘Natural Cream- Light.’
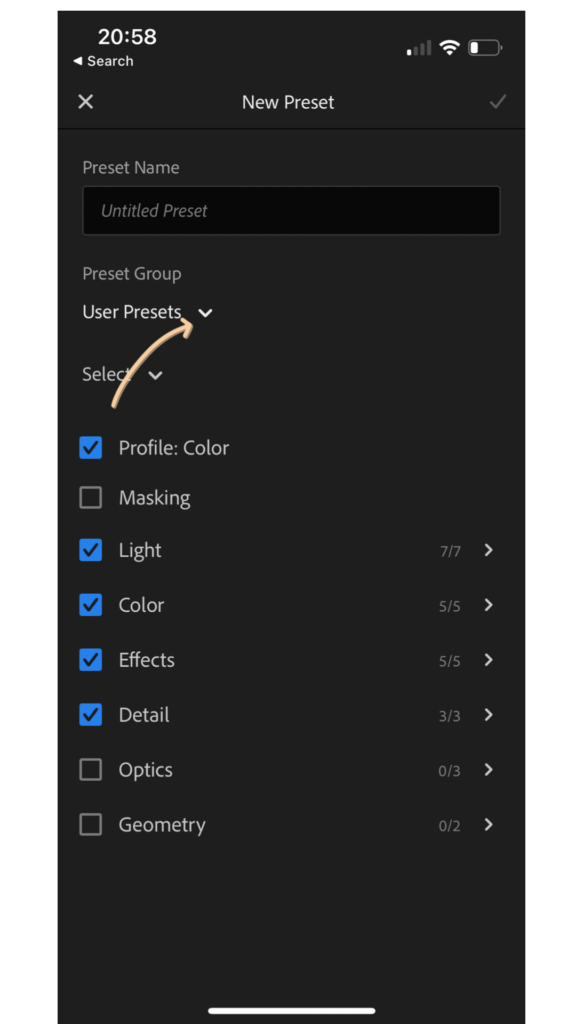
15.
I’d now choose a group you wish to save it in to be able to find your preset easily. Feel free to create a new group. I may do this if I want a Preset Group for Winter only presets I use and another group for presets in Summer.
16.
Now when you have added the Preset Name and selected the Preset Group you wish to save the preset too. Click the tick icon to continue. It’ll now be saved under that ‘Presets’ icon in the group you selected.
And that’s it- it seems like a lot of steps but once you get the hang of it- it’s easy. I hope you liked this post and if you are interested in reading any more posts like this ‘A 16 Step by step guide on downloading and saving a Mobile Preset to Lightroom’ then click here


Leave a Reply